Posting denials and $0 payment Explanation of Reviews (EORs) is essential.
Posting these ensures accurate reporting and prevents (or completes) No Response tasks. Posting $0 reimbursement is necessary for both Original Bills and any subsequent Second Bill Review / Appeal submissions.
Here’s how it’s done.
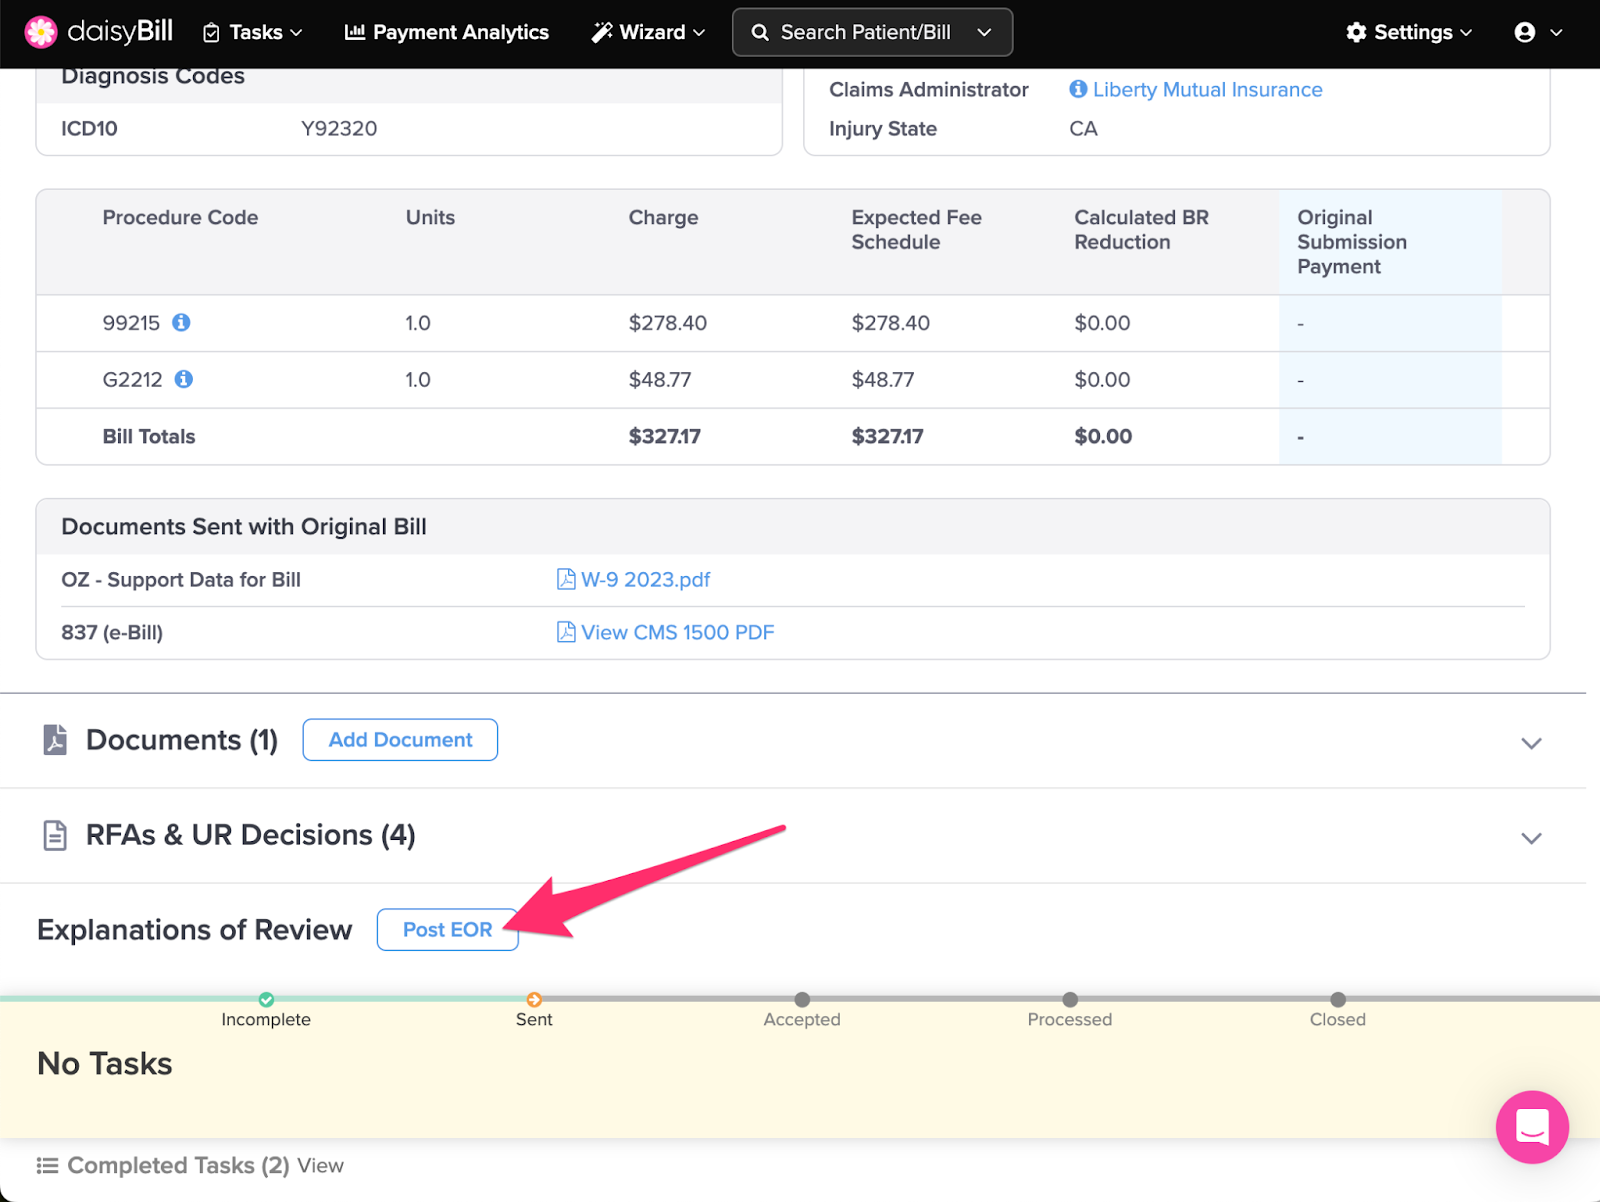
Step 1. For your bill in ‘Accepted’ status, click ‘Post EOR’
To prevent duplicate postings, only post $0 reimbursements for bills in Accepted status. For more information, see the Help Topic: Bill Status.
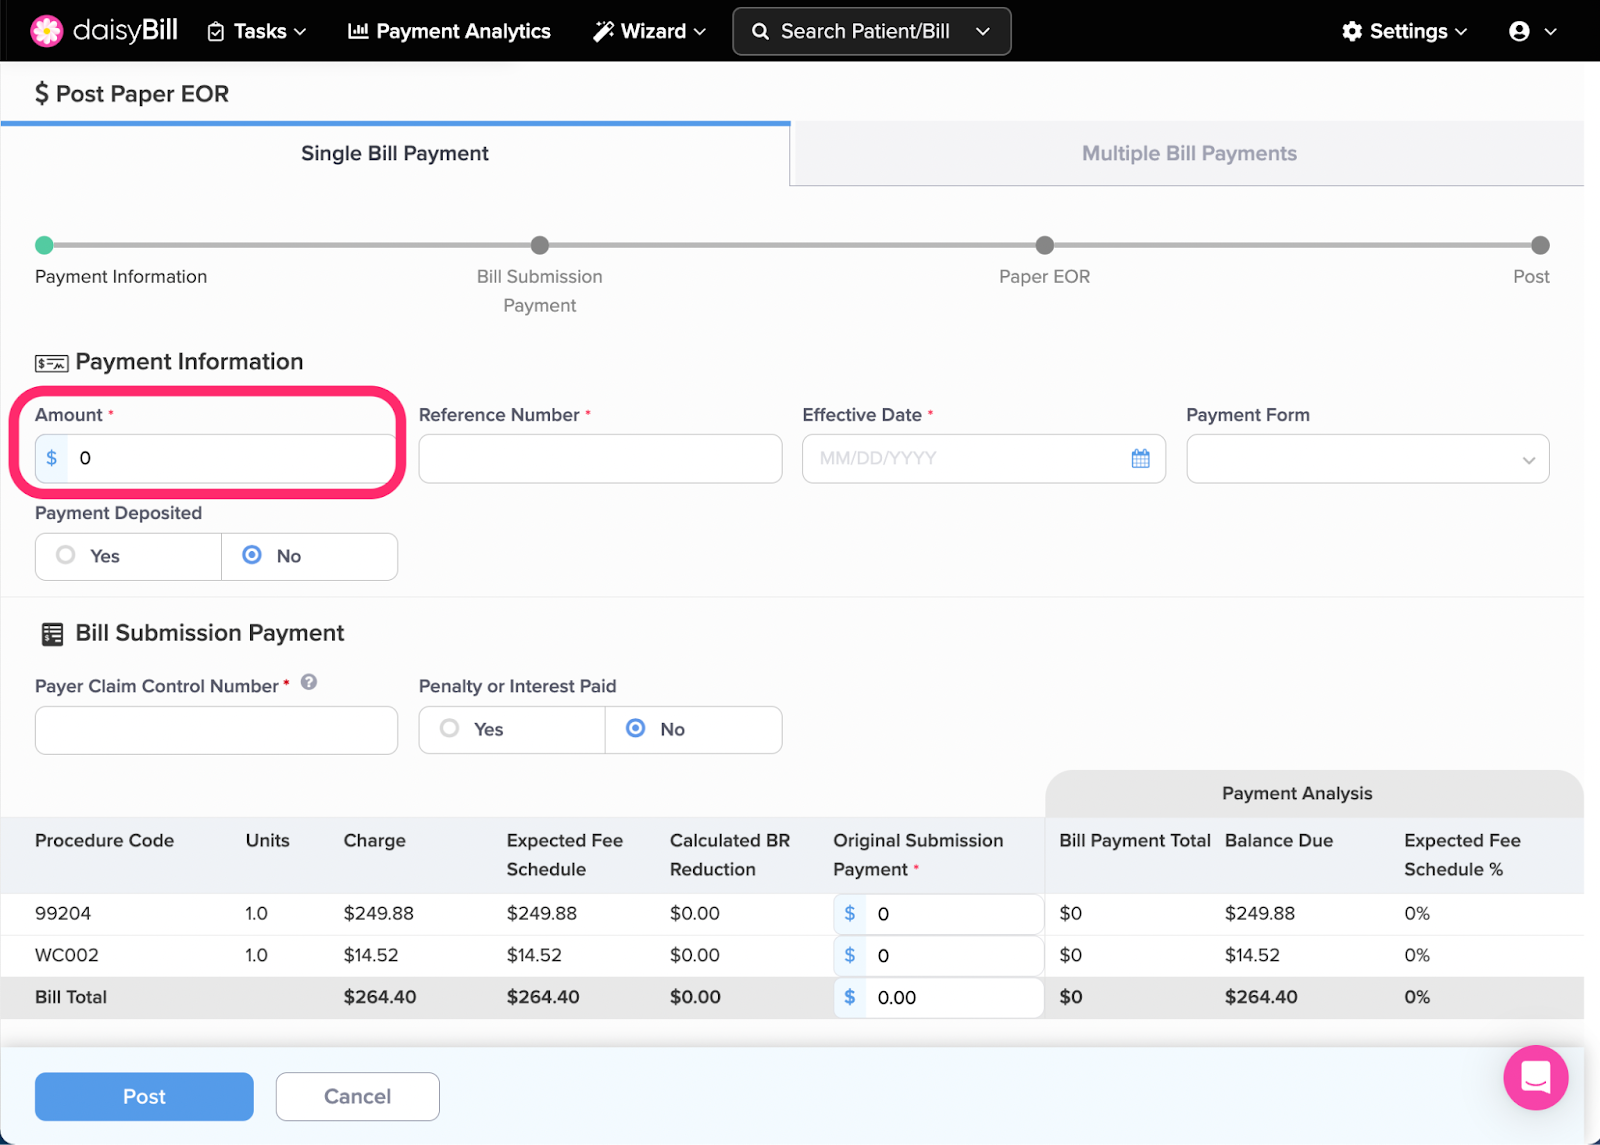
Step 2. For ‘Amount,’ enter ‘0’
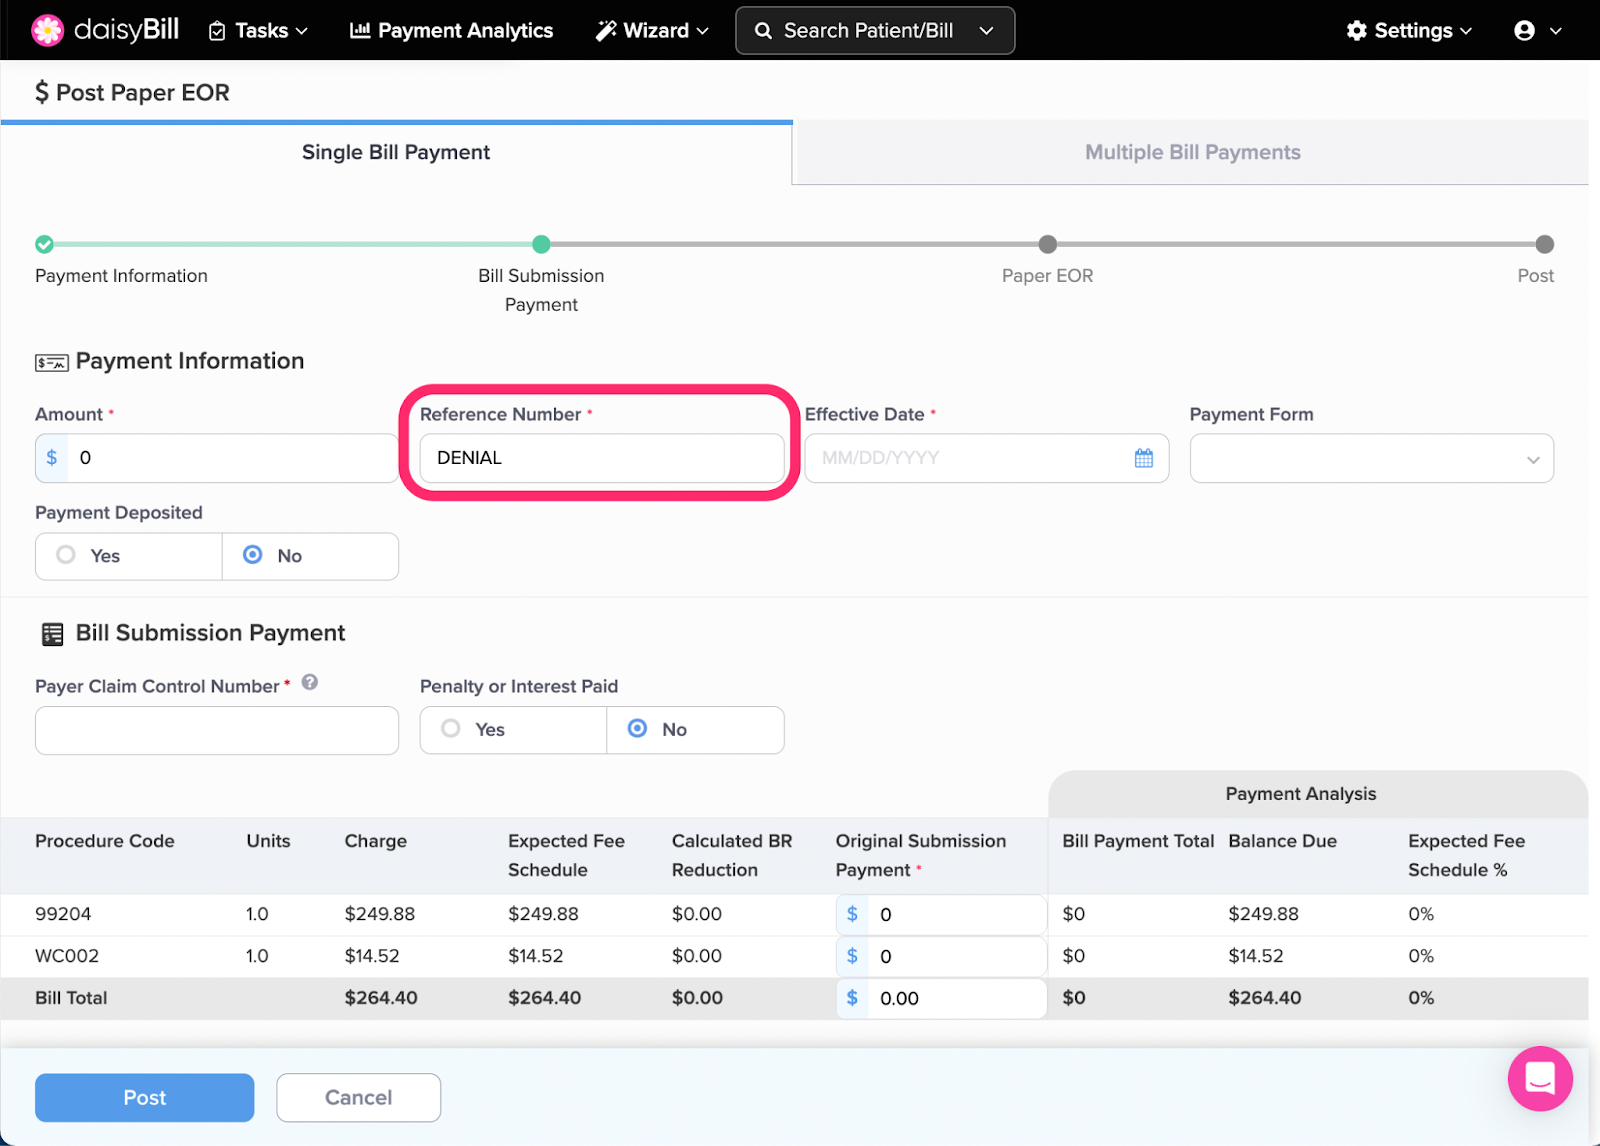
Step 3. For ‘Reference Number,’ enter either 0, ‘No Check’ or ‘Denial’
Step 4. For ‘Effective Date,’ enter the date of EOR or Denial letter
The fields Payment Form and Payment Deposited can be left blank since no payment was made.
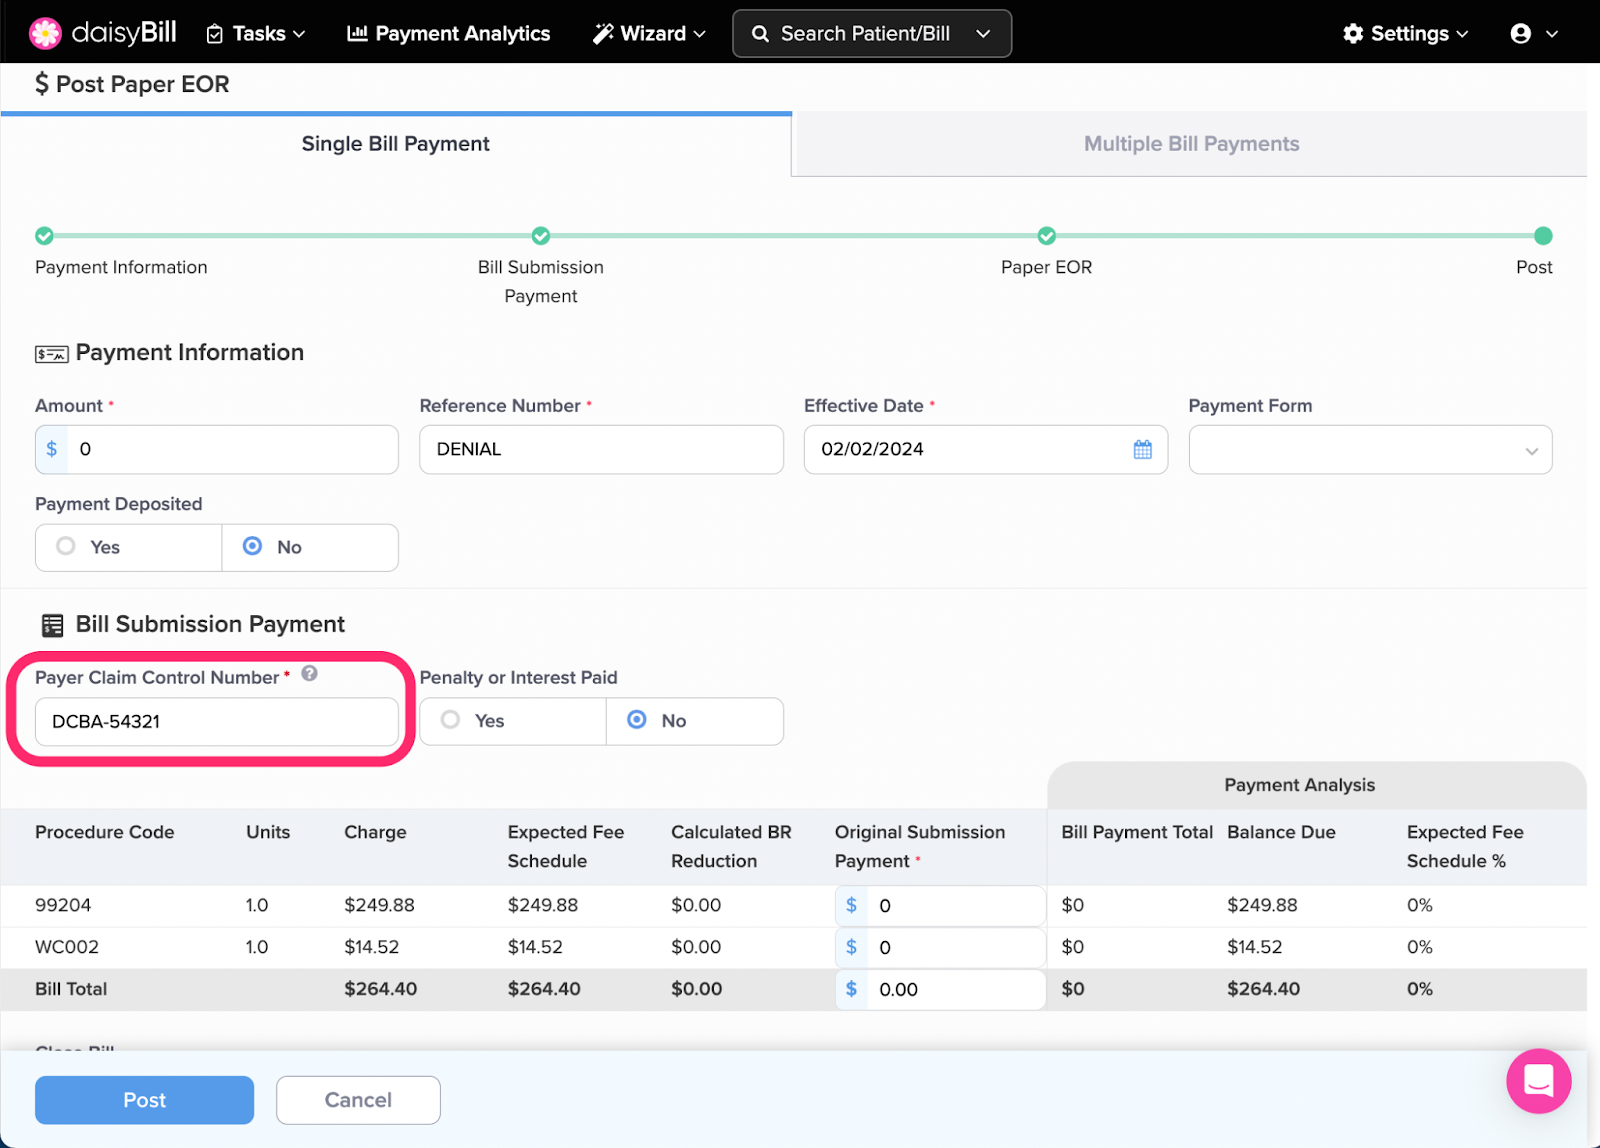
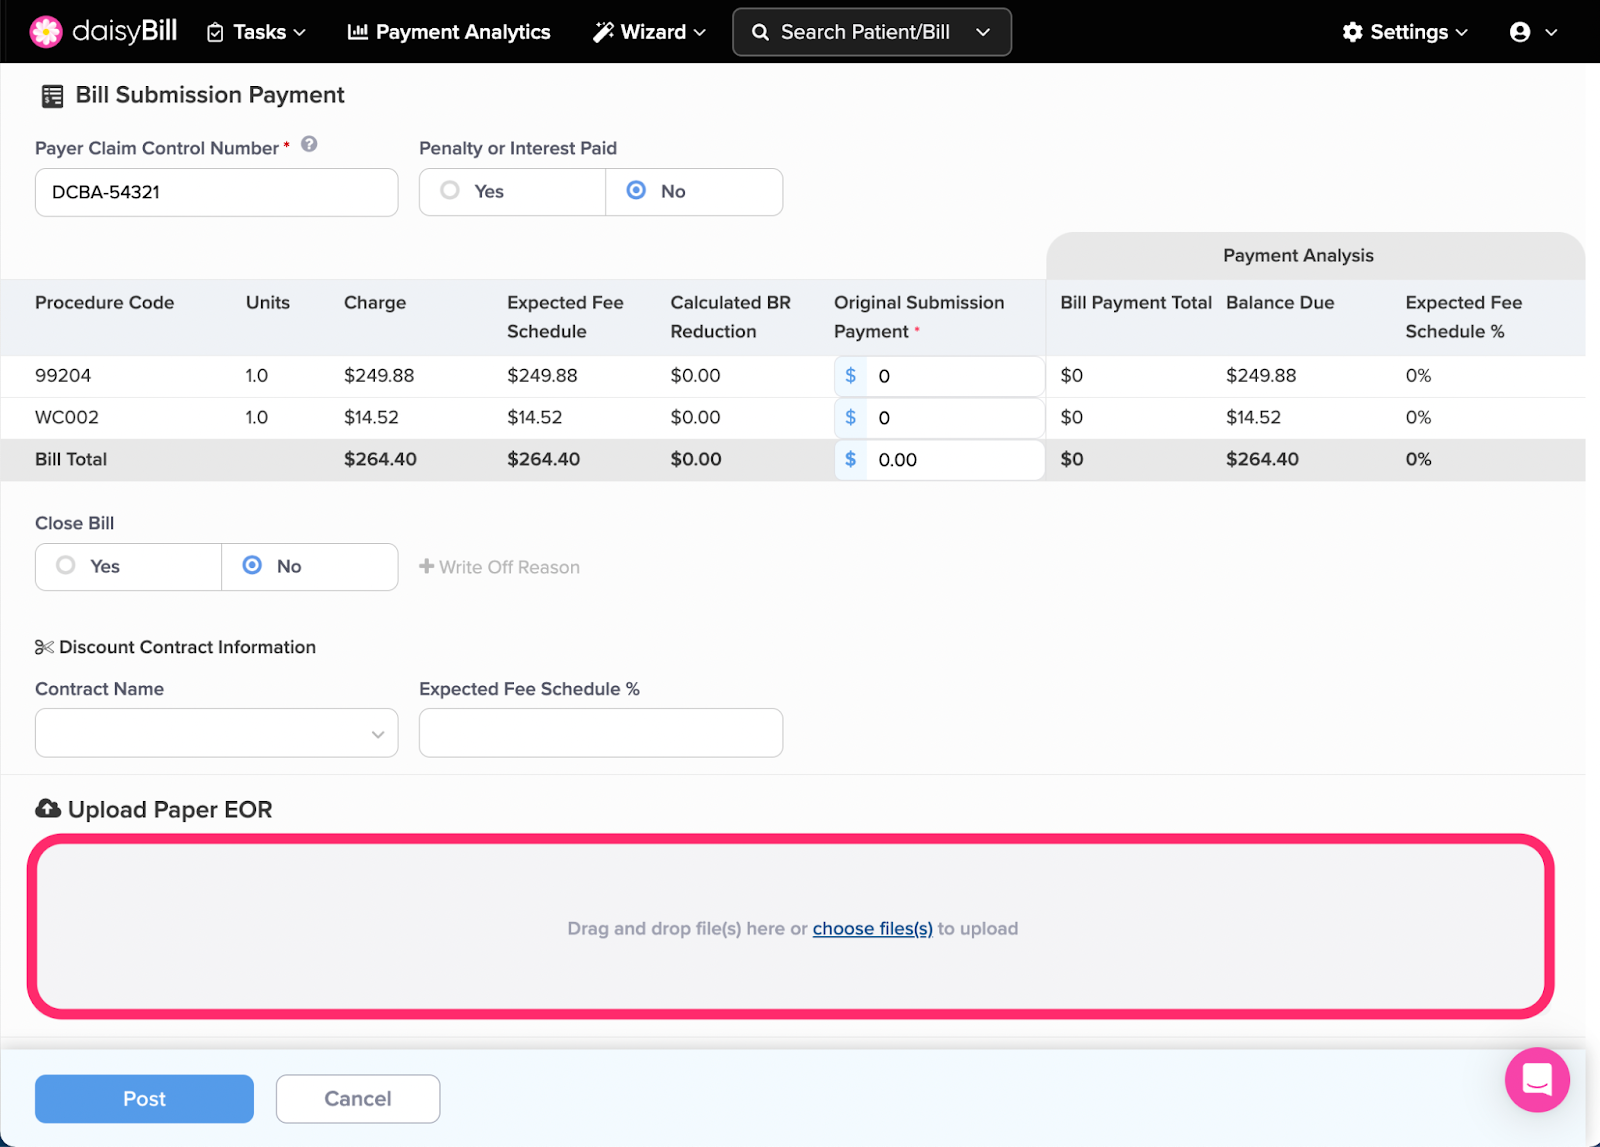
Step 5. Enter the ‘Payer Claim Control Number’ found on the EOR
If a Payer Claim Control Number is not listed on the EOR, use the patient’s Claim Number. For more information, see the Help Article: Payer Claim Control Number.
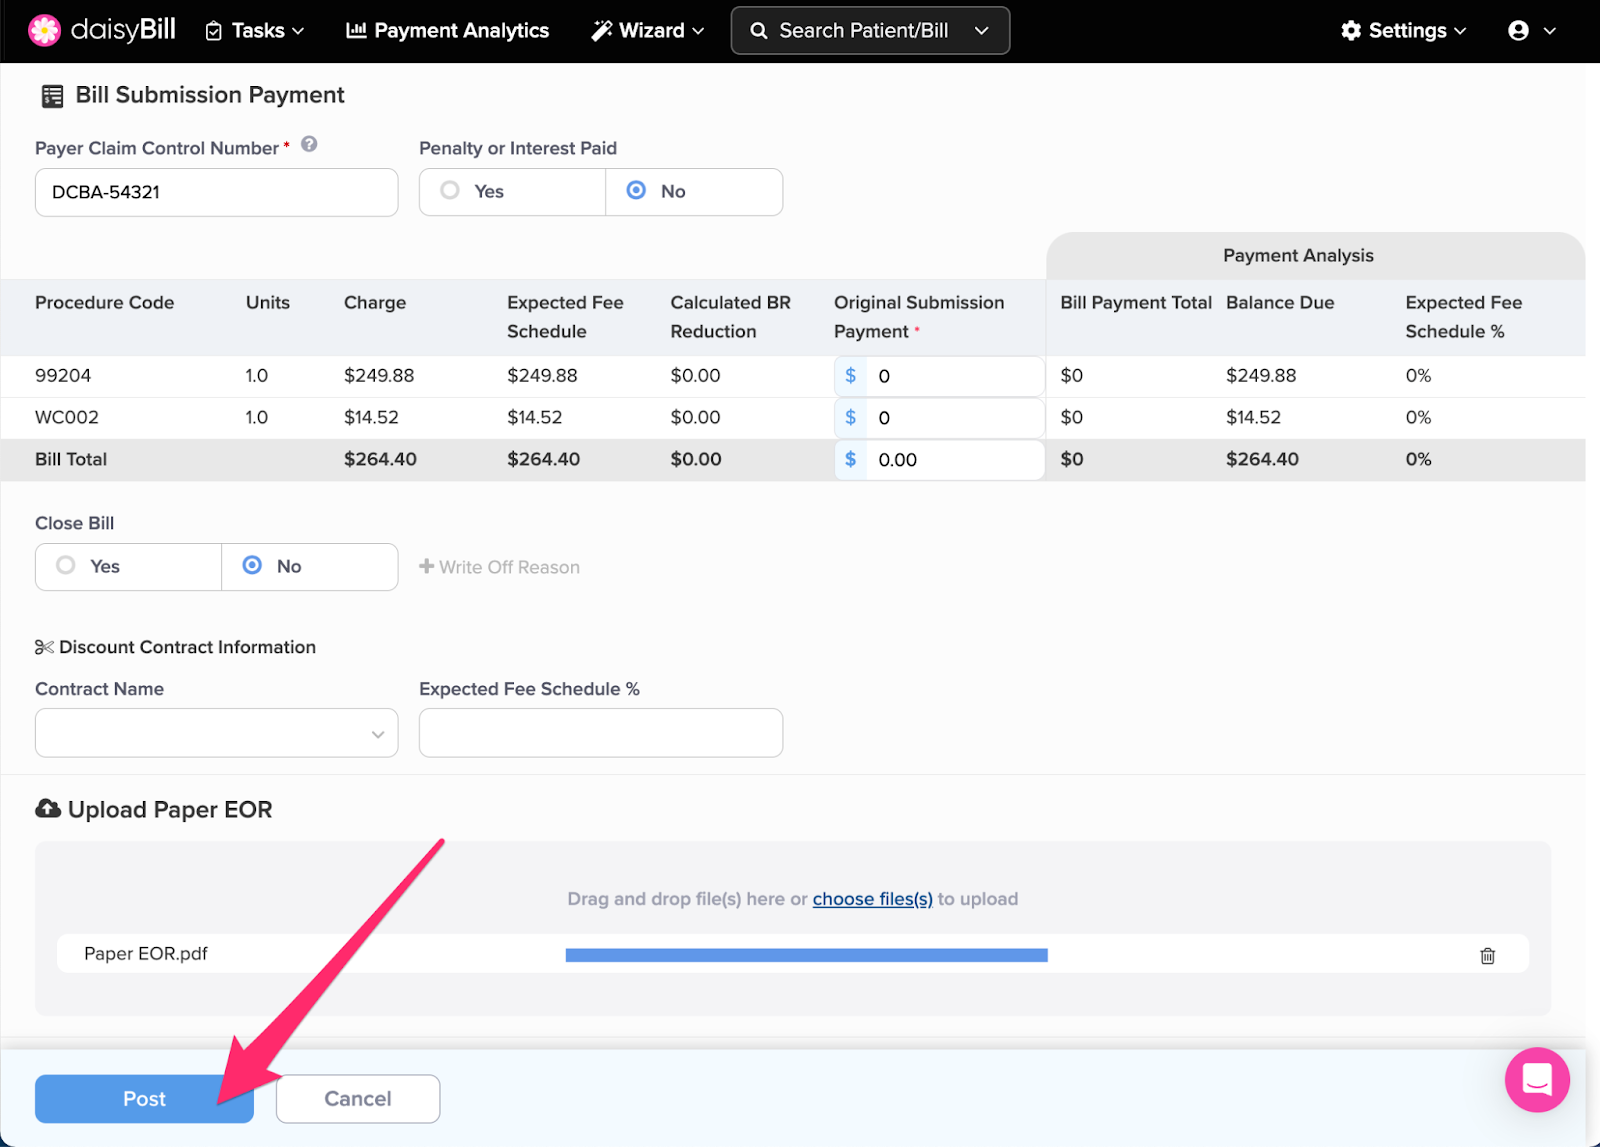
Step 6. Optional: click ‘Choose Files’ to upload a Paper EOR
daisyBill will attach the uploaded EOR directly to the bill for easy reference in the future. Best practice is to always upload the paper EOR.
Step 7. Click ‘Post’
Smart recordkeeping made easy!
